The creamiest custard pie you will ever taste, in a gluten free crust. Enjoy warm from the oven, or chilled the next day.
Looking for something specific?

The crust holds up a pie, supports its flavor, and makes the entire dish possible. In gluten free baking, though, the crust is often the hardest part to get right. Without gluten to bind everything together, the result can be dry, fragile, and disappointing - hardly the foundation of a good pie.
The base of this pie crust is a rich combination of sorghum flour, almond flour, and butter. Sorghum flour and butter are an especially satisfying pairing, with the butter softening sorghum’s rougher edges and bringing out a warm, full flavor. Almond flour adds a toothsome nuttiness, giving the finished crust a tender, light, crumbly texture that works beautifully with fruit pies, custard pies, and more.
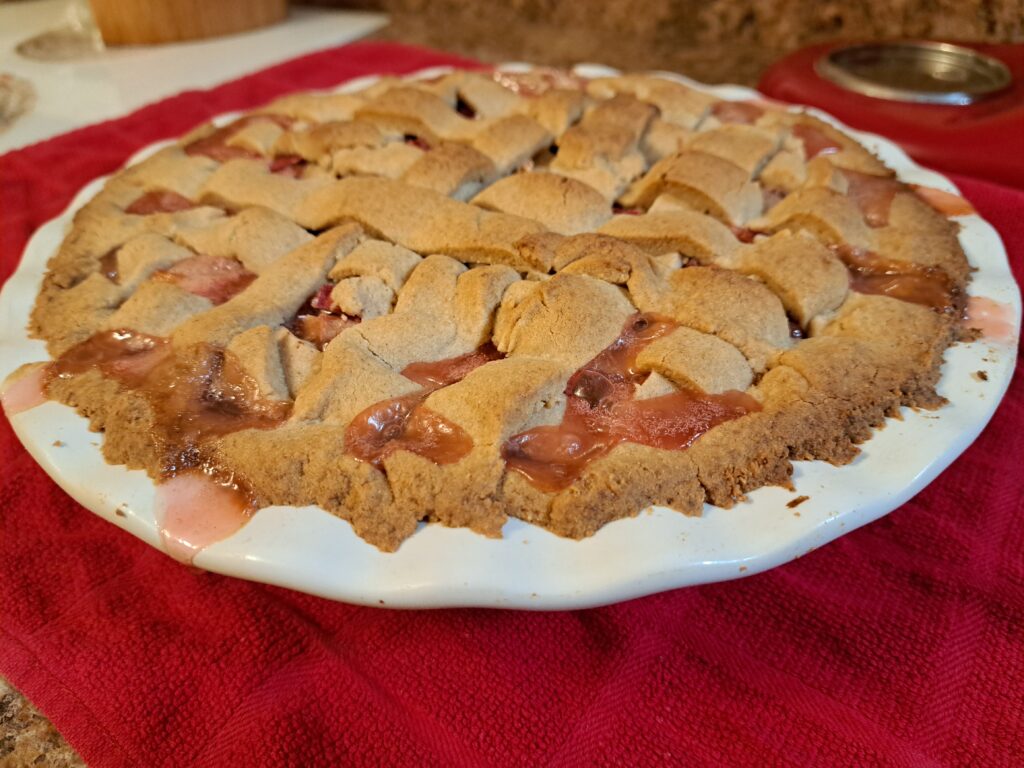
Pie inspiration: a gluten free rhubarb pie with lattice crust
;void(0); "Share on pinterest")
(1) Get your two sticks of butter out of the fridge well ahead of making the pie crust, so that they can come to room temperature.
(2) Combine all the dry ingredients - sorghum flour, almond flour, and salt - in a medium sized bowl. If making a sweet pie, add up to 2 tablespoons of sugar to the flour mix.
(3) Cream the butter into the dry ingredients. The addition of the butter should be enough to hold the flour together into a dough, but if it does not, add a little bit of cold water.
(4) Roll your pie crust out, and proceed with your pie recipe!
The two most common fat options for pie crust are butter and shortening. I grew up making pie crust with shortening, and I will happily admit that it is an easy ingredient to work with. Even so, I am now firmly team butter, and I would not go back.
Butter brings a depth of flavor that shortening - not even butter-flavored shortening - can provide. And when you are already navigating texture challenges in gluten free baking, flavor matters even more.
Shortening does have its strengths. Because it stays solid longer than butter, it makes dough easier to handle and can contribute to a more tender, workable pastry. But for me, the tradeoff in flavor is not worth it. Butter gives this crust the richness that makes the whole pie taste better.
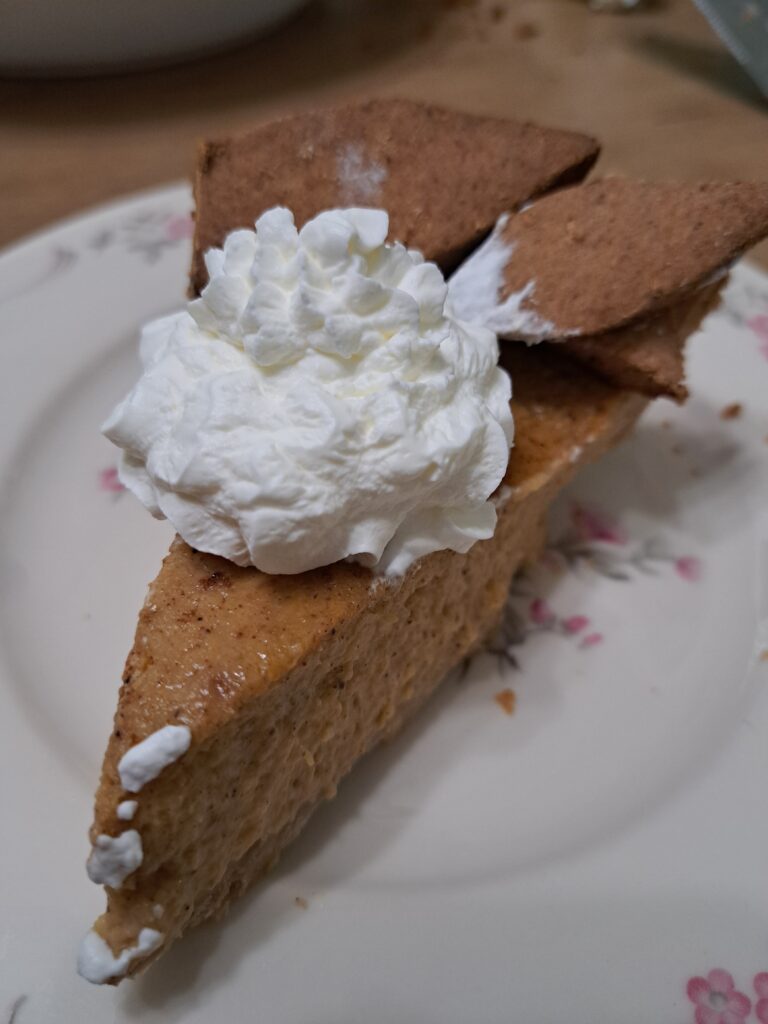
Pie inspiration: a slice of gluten free pumpkin pie
Butter also feels like the more natural fit for my kitchen. Crisco, the shortening brand, was introduced in 1911 as a shelf-stable hydrogenated vegetable oil and was once celebrated as a modern improvement over traditional fats. Later, partially hydrogenated oils - the main source of artificial trans fat in the food supply - were found to be unsafe, and the FDA banned them in the United States. Today’s shortenings are different from the old trans-fat versions, but they are still highly processed ingredients with limited nutritional value, and I would rather build a pie crust around butter.[source]
If you need a dairy-free option, coconut oil can work in place of the butter. It will change the flavor and may make the dough handle a bit differently, but it is a reasonable substitute if dairy is off the table.
A point of trivia: "officially" shortening means any fat used to make a dough "short," which is to say, tender and a little crumbly, like a pie crust or shortbread. Fats do this by coating the gluten in wheat-based pastry, so it can't stretch and form the textures more associated with bread. That said, most American bakers use the word to mean vegetable shortenings such as Crisco.
When people talk about pastry, one of the first words that comes up is flaky. That texture usually comes from keeping small pieces or thin layers of cold fat in the dough. In the oven, those pieces melt, and in the case of butter, the water in the butter turns to steam, helping create delicate layers in the finished crust.[source]
But flakiness is only one kind of pastry success. A really good pie crust can also be tender, rich, delicate, and full of flavor.
This recipe does use cold butter - the queen of flakiness - so the finished crust is not flat or heavy. But dramatic flake is not the main goal here. Instead, this is a pie crust that bakes up tender, lightly crumbly, and satisfying to eat. Its the kind of crust that supports the filling beautifully and still tastes wonderful on its own.
In fact, if you end up with extra pie dough, a great use of it is to bake it up in the oven with a little cinnamon and sugar sprinkled over the top. It bakes up like a cookie or tea biscuit - great as a little treat with tea or coffee.
In a traditional wheat crust, flakiness and structure depend heavily on how flour, fat, and gluten interact. In a gluten free crust, the balance is different. Rather than chasing maximum layers at all costs, this recipe aims for something I find even more important: a crust that just works for every single pie.
As a gluten free pie crust, this dough is more delicate. But that does not mean that fancy elements are not achievable, they just require a little bit more care.
For every step of rolling out your bottom crust, top crust (if relevant), or designing decorations, you want to keep your dough cool, but not cold. Cool, because you do not want to melt the butter, or turn the dough into a sticky mess. But not so cold that you cannot manipulate the dough; if the dough is fresh out of the refrigerator (because you were, say, cooling it down, or making it ahead), it will be far too hard to roll. You are aiming for a range just under room temperature.
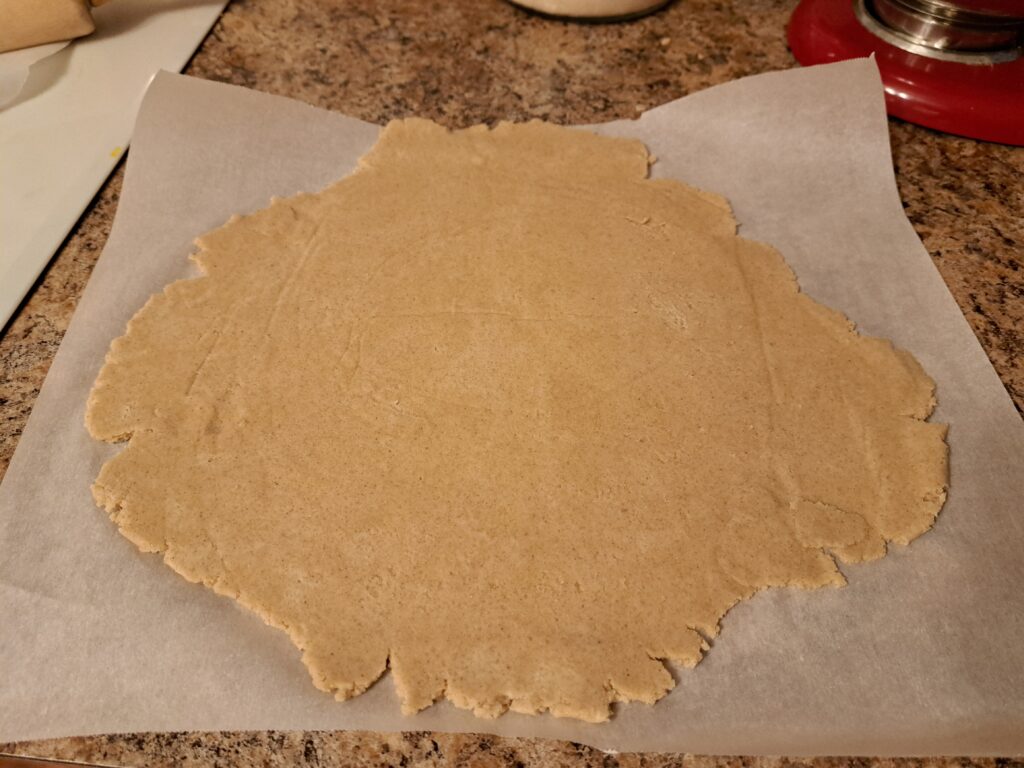
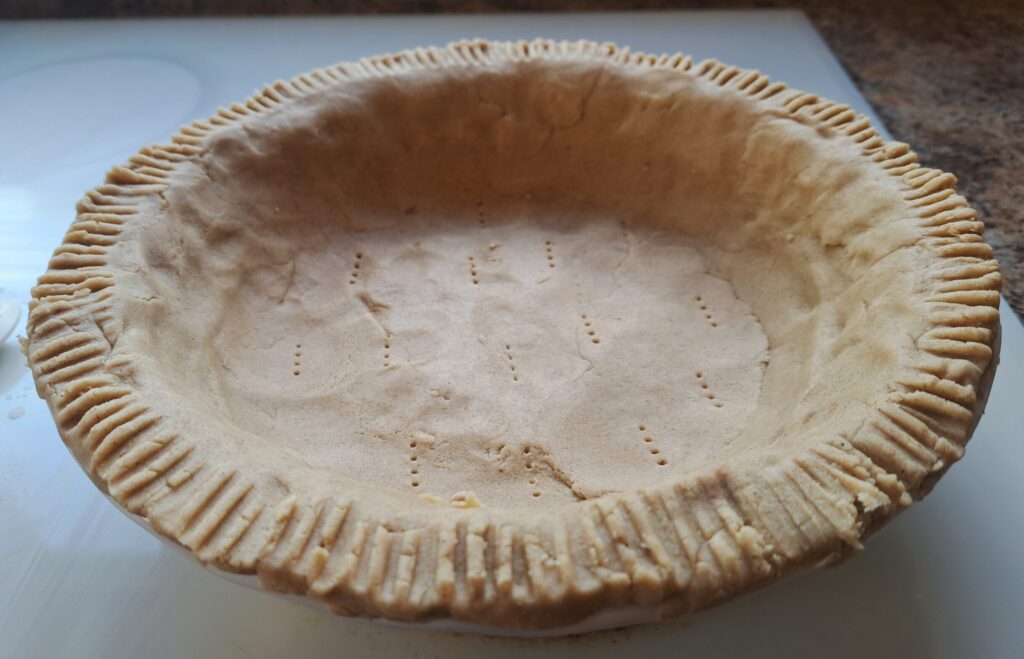
Rolled out pie crust
As with regular pie dough, parchment paper is your friend. Tear out two sheets of parchment paper - one to go underneath your dough, and one to go over. They should be slightly bigger than you anticipate your full round of dough being. Lay the bottom layer out flat, and sprinkle a little brown rice flour over it. Place your pie dough in the middle, and sprinkle with more rice flour, then lay your second layer of parchment paper on top.
Roll your dough out to your desired thickness, using that top layer of parchment paper to keep your rolling pin from sticking. Once your dough circle is big enough, peel off the top layer of parchment, and transfer your round to the pie plate. Flip the dough over, and peel off the back parchment paper.
If all went well, you should have a mostly intact and flat layer of pie dough draped over your pie plate, ready to be cut to shape. But if you're like me, there's probably at least a crack or two in your dough. Use any excess dough to patch up cracks, and make sure you have an even amount of crust the whole way around. If your dough is too dry to stick to itself, a little water can be added to smooth over any patches.
Lattice crusts are definitely one of the trickier pie decorations, especially with gluten free dough. But they are still very doable.
To begin, roll out a round of dough large enough to cover the top of the pie, then cut it into even strips. Carefully transfer half your strips to your filled pie, laying them all going in one direction, spaced evenly. Make sure to use a spatula or butter knife during transfer to support each strip; remember, they are delicate.
Now gently fold back every other strip, and lay a new strip across the center in the opposite direction. Unfold the first set, fold back the alternating strips, and continue weaving until the pattern is complete. That folding and unfolding will possibly cause cracks - use some water to patch them up, and then keep weaving.
This technique will work better with thicker strips, to give it more stability. And the good news is, the natural texture of the lattice itself provides plenty of opportunities to cover up imperfections.
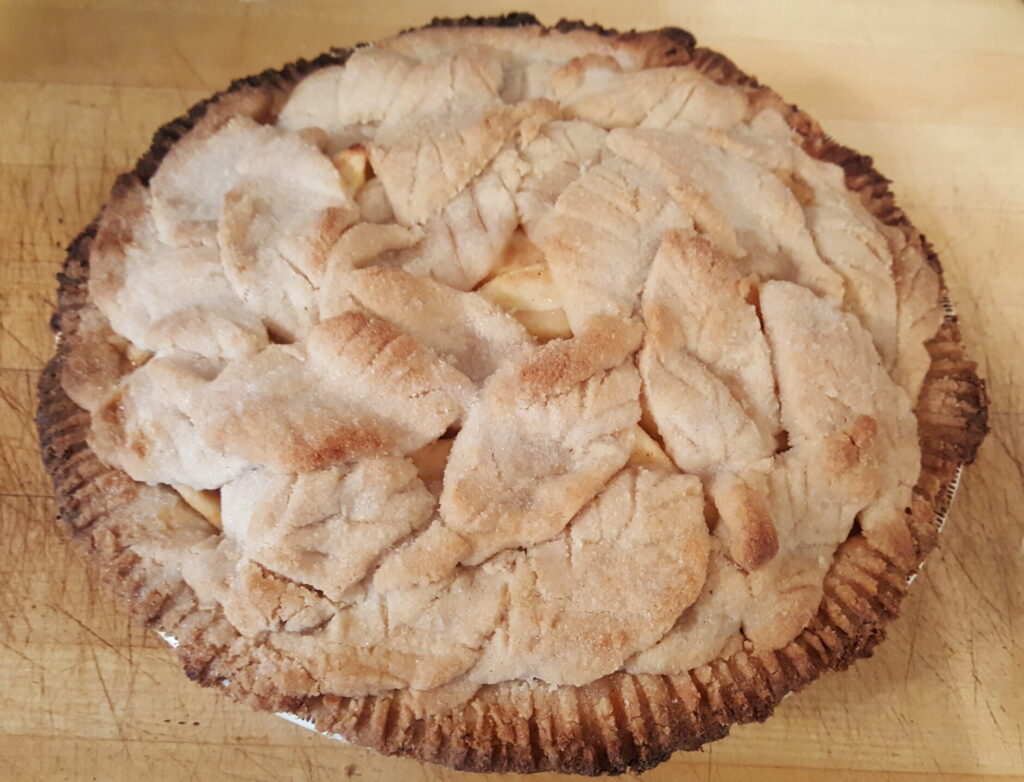
Gluten-free apple pie with leaf decorations
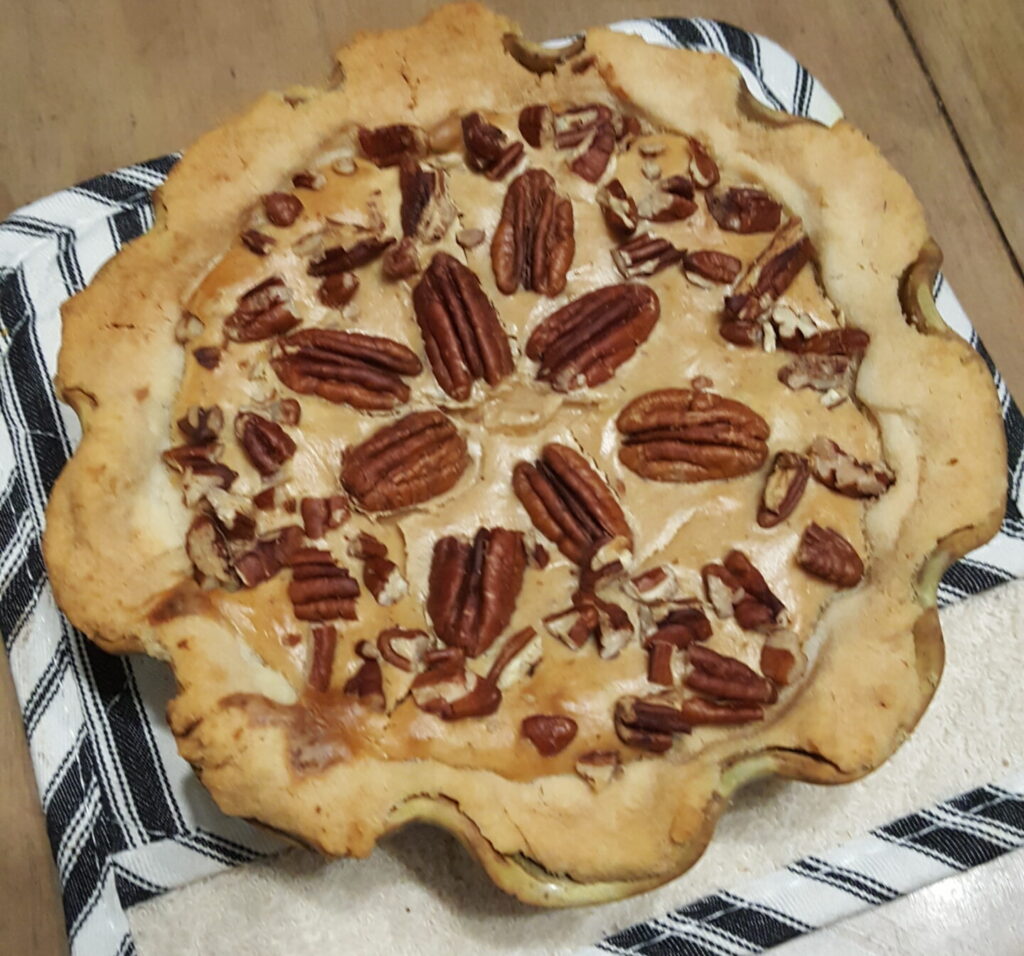
Gluten-free pecan cheesecake pie
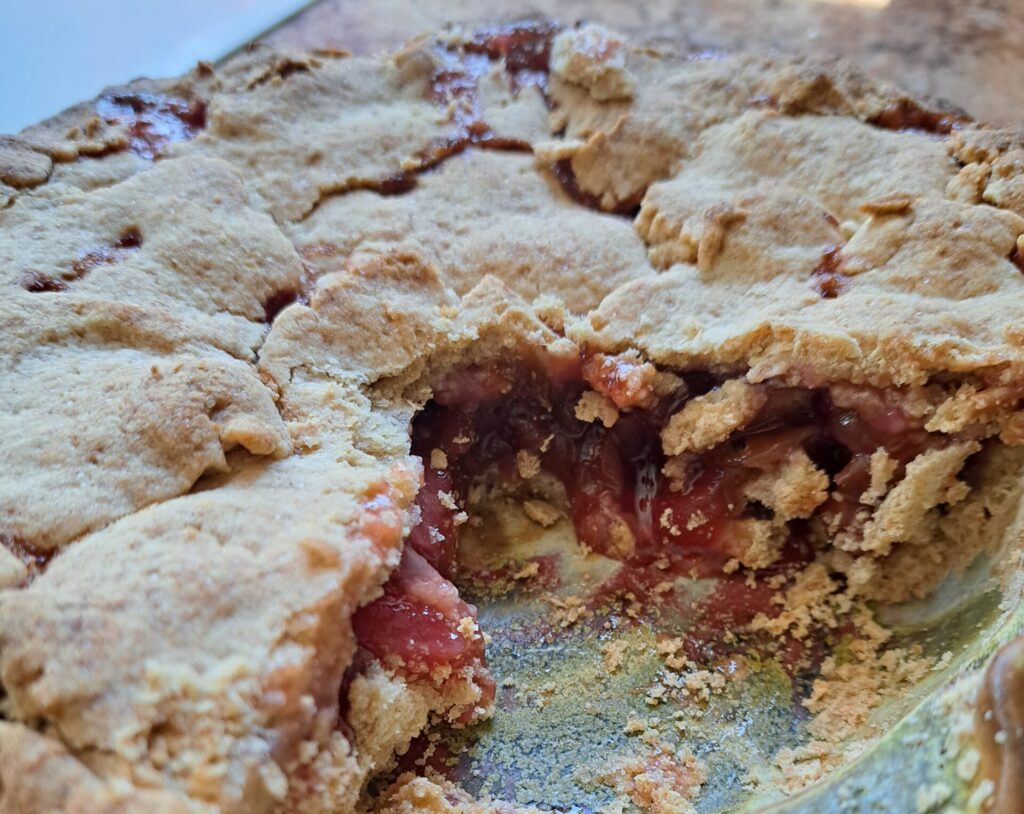
Gluten-free rustic berry pie
This is honestly an easier route to go with gluten-free pie dough. Roll out your dough, and cut out your desired shapes - either with a knife, or a cookie cutter. Use a spatula or butter knife to carefully detach them from the parchment paper, and place on top of your pie - or on a baking sheet, if you are baking them separately.
This dough is sturdy enough to handle leaves, fruits, and other relatively solid shapes very well without crumbling or breaking.
As with every recipe, the choice of flour is key to making this one work. There are, however, some options when it comes to substituting flours.
The sorghum flour adds wholemeal body, nutrition, and pairs really well with the butter and sugar content of this recipe. It does not have much in the way of any binding properties of its own, however. So in a pinch, you may have luck substituting it for rice flour (either brown or sweet white rice), or a store bought gluten free flour mix. The result will be a softer and slightly stickier dough, but that's not necessarily a bad thing. Just adjust the water content as needed to bring the dough together.
I would not try to substitute in a nut or coconut based flour here, since those have very different properties.
If you are curious about the properties of sorghum flour, I have more information in my sorghum flour baking guide.
I like almond flour because it produces a nice result while also being pretty widely available and easy to stock in my pantry. That said, you can substitute in other nut flours, and still get similar results. Just be mindful of the fact that different nut flours will bring in different tastes.
Generally, if a pie crust needs to be baked before adding the filling, the recipe will specify the exact conditions. But if you find yourself without a recipe, venturing out into the wilds of experimentation, here's a few tips on baking this pie crust.
Blind baking, or parbaking, a crust refers to the process where you partially bake a crust without filling. This is a useful technique if your filling is more liquid, and you don't want it to soak into your bottom crust. My pumpkin pie recipe uses this technique.
To blind bake this pie crust, do the following:
Gluten-free pie crust, ready to go into the oven
Some recipes do best when the pie crust is fully baked before adding the filling - for instance, certain pudding or cheesecake based pies, or even some more delicate berry pies like strawberry.
To fully bake this pie crust, do the following:
Yes, with caveats.
Your dough will keep in the fridge for a few days, however during that time, it will harden and dry out. So be prepared to let it warm up and rehydrate it with a little more water before rolling it out.
This dough rolls out the easiest when it is freshly made, and slightly cool.
This is recipe dependent, because it really depends on your filling. The crust performs equally well in recipes that call for blind baking, and those that do not.
I do have some recommendations for baking this crust without filling, which you can read in the recipe notes.
Quick answer: its too dry. And maybe too cold.
While a gluten-free pie crust is likely to be delicate, it should not be cracking anywhere but at the edges while you are rolling it out. If you run into this problem, add another tablespoon of water, knead the dough a little to distribute, and then try rolling it out again.
Too much fat! If your pie crust separates or shrinks and starts sliding down the sides of your pie plate in the oven, it has too much fat.
It might still taste acceptable; it just looks untidy.
Unfortunately, you cannot fix this problem mid-bake (which is when you will discover it). Just use a little bit less fat next time.
Yes! This crust is sturdy enough to form a top layer or lattice top. If you want to learn more about weaving it into a lattice top, or other pie decorations, check out my recipe notes.
Yes. I recommend using coconut oil in place of the butter.
The texture and flavor will be a little bit different, but the recipe at the given ratios will still work.
Yes. Brown rice flour, white rice flour, or a cup for cup gluten-free flour mix are all acceptable substitutes. Just bear in mind that you may get a softer, or slightly gummier, texture with a flour substitute (especially in the case of white rice flour).
You can read more about substituting flours in the recipe notes.
Yes! Any nut flour is a safe substitute for the almond.
Just be aware that different nut flours have their own flavors (which, honestly, could be a boon to your pie!)
You can read more about substituting flours in the recipe notes.

Rhubarb pie with a lattice crust
The creamiest custard pie you will ever taste, in a gluten free crust. Enjoy warm from the oven, or chilled the next day.
Think pumpkin, warm spices, custard, and a dollop of whipped cream - isn't that the taste of fall? This gluten free pumpkin pie recipe will let you conjure that fall feel any time of year!

